Thứ Bảy, 6 tháng 8, 2016

chua chay lý thuyết

Khái niệm về cháy:
     Cháy là phản ứng hoá học hỗn hợp trong đó có toả nhiệt.
2. Các yếu tố hình thành nên cháy:
-       Không khí
-       Chất cháy: vừa đủ
-       Nguồn nhiệt: vừa đủ
-       Chất cháy + Không Khí + Nguồn nhiệt = CHÁY
-       * Nếu tách rời 3 yếu tố đó ra thì không thể có cháy.
-       MỘT SỐ NGUYÊN NHÂN GÂY CHÁY
-       A. cháy do con người gây ra:
  - Sơ suất gây cháy do thiếu hiểu biết về phòng cháy chữa cháy.
 - Vi phạm các chế độ, nội quy, quy định về phòng cháy chữa cháy trong sản xuất kinh doanh như: dùng ngọn lửa trần ở nơi cấm lửa, vi phạm quy trình công nghệ trong khi vận hành máy móc, thiết bị.
 - Để phi tang những hành vi tham ô, trộm cắp, để trả thù hoặc kẻ địch phá hoại.
     - Sử dụng các thiết bị điện không đúng quy cách:
-              + Hiện tượng qúa tải
-              + Chập mạch
-              + Mối nối lỏng
-              + Hồ quang điện
-       b. Cháy do thiên tai:
- Sét đánh vào những công trình do không có hệ thống chống sét hoặc có nhưng không đảm bảo theo tiêu chuẩn.
-       c. Tự cháy:
-       Các chất cháy tiếp xúc với không khí và tự bốc cháy ở
-           một nhiệt độ nhất định.
-       Các chất cháy phản ứng với nhau và tự bốc cháy không cần nhiệt độ từ bên ngoài cung cấp.
-       Do quá trình tích nhiệt:
-       Ví dụ: Giẻ lau máy có dầu mỡ, lâu ngày do oxy hóa tích nhiệt 1 số dầu thảo mộc (dầu bóng, dầu gai …) do quá trình oxy hóa làm tăng nhiệt độ đến nhiệt độ tự động bốc cháy.
CÁC BIỆN PHÁP CHỮA CHÁY
1.Làm ngạt
2.Làm lạnh
3.Làm loãng
1.  Làm ngạt: (bột, cát)
-       Bình bột chữa cháy: bột + CO2 (ít)
-       Bình CO2 dùng để chữa những đám cháy điện
      CO2 là một chất khí sạch, không làm rỉ sét, nó dập tắt cháy bằng cách làm loãng hỗn hợp không khí & CO2 tới một tỷ lệ ở dưới mức giới hạn có thể duy trì sự cháy. Hệ thống này ứng dụng tại những nơi mà nếu dùng những chất chữa cháy khác có thể làm hư hỏng máy móc, thiết bị.
3. Làm loãng (Cách ly vật cháy với oxy)
-       Ngăn cản đám cháy không cho bị lay lan sang các vật
      dụng hay các khu vực lân cận
Lưu ý: Trong quá trình chữa cháy phải tuân thủ theo các quy định sau:
a. Phải cúp điện
b.Khi có điện tuyệt đối không dùng nước để chữa cháy
CÁC LOẠI BÌNH CHỮA CHÁY
       Bình CO2:
-  Bình CO2 nặng từ 1,5 – 100 kg.
-       Bình CO2 dùng để chữa cháy ở môi trường kín, chất cháy là các thiết bị điện.
-       Kiểm tra bình bằng cách cân nặng
       Bình bột:
-       Chữa ở môi trường rắn, khó và lỏng.
-       Kiểm tra bình bằng cách nhìn đồng hồ bên ngoài.
   + Vạch xanh, vàng: ok
   + Vạch đỏ: hết khí
BÁO ĐỘNG KHI CÓ CHÁY
       Khi nghe chuông báo động, điều đầu tiên là bạn không nên hoảng loạn.
       Hãy nhớ rằng khi khách thấy nhân viên hoảng loạn, họ cũng sẽ hoảng loạn theo và điều đó chứng tỏ chúng ta không có một tổ chức chuyên nghiệp khi có sự cố xảy ra.
       Xác định những người có trách nhiệm và khả năng và bắt tay vào việc xử lý tình huống.
       Khi có cháy xảy ra, phải bật tất cả các chuông báo động cho đến khi có người đến xử lý đám cháy.
       Khi có cháy xảy ra, đặt biệt nghiêm cấm việc sử dụng thang máy.
       Liên lạc với bộ phận Lễ Tân về mọi vấn đề khi có sự cố cháy xảy ra.
THÔNG TIN CHUNG
       Khi có cháy xảy ra, phần lối đi ở cầu thang không nên sử dụng trong trường hợp giải quyết các sự cố từ tầng trên.
       Giải phóng các vật dễ cháy gần khu vực cháy nhằm tránh cháy lay lan ra khu vực khác.
Các thiết bị chữa cháy trong phòng khách
Thiết bị hút khói
HỆ THỐNG VÒI NƯỚC CHỮA CHÁY TẠI ES ANA
    MỀN CHỮA CHÁY
CÁC LOẠI BÌNH CHỮA CHÁY
Khi đám cháy xảy ra trong phạm vi có điện bạn cần nhanh chóng thực hiện các nhiệm vụ theo thứ tự nào sau đây:
1.Báo động – Cắt điện – Dùng các phương tiện dụng cụ hiện có để tiến hành chữa cháy – Điện thoại cho đội PCCC 114.
2.Cắt điện - Điện thoại cho đội PCCC 114 - Báo động - Dùng các phương tiện dụng cụ hiện có để tiến hành chữa cháy.
3.  Báo động – Cắt điện - Dùng các phương tiện dụng cụ hiện có để tiến hành chữa cháy - Điện thoại cho đội PCCC 114
CÂU HỎI TỔNG HỢP
1.Khái niệm về cháy:
a. Cháy là một phản ứng hoá lý có toả nhiệt và phát ra ánh sáng
b.Cháy là một phản ứng hoá học có toả nhiệt và phát ra ánh sáng
c. Cháy là một phản ứng hoá học có toả nhiệt và phát ra tiếng nổ
2. Có 3 yếu tố cần thiết cho sự cháy đó là:
a. Xăng dầu – gỗ - tranh tre nứa lá, lửa – oxy.
b.Oxy – chất cháy – nhiệt độ cao
c. Chất cháy – nguồn nhiệt và oxy
4. Kim đồng hồ gắn trên bình bột chữa cháy chỉ vạch xanh thể hiện:
a. Bình đã hết khí
b.Đủ lượng khí để đẩy bột ra khỏi bình
c. Áp lực khí nén trong bình tăng quá mức quy định
6. Nguyên chính gây cháy do điện
a. Do chập điên – do bất cẩn – hồ quang điện – mối nối lỏng – do phát tia lửa điện
b.Do bất cẩn – do tia lửa điện – chập điện – nổ cầu chì do quá tải – do thiết bị điện bị sự cố.
c. Do chập mạch điện – do quá tải – điện trở tiếp xúc – do truyền nhiệt của vật tiêu thụ điện – do tĩnh điện – do hồ quang điện
7. Các biện pháp kiểm tra bình CO2 và bình bột chữa cháy:
a. Cân nặng – kiểm tra vỏ ngoài - kiểm tra loa vòi – kiểm tra đồng hồ áp suất.
b.Cân nặng – bóp thử - xem bên ngoài – kiểm tra lao vòi.
c. Cân nặng –xem tra loa vòi – xem bên ngoài
8. Khi đám cháy xảy ra trong phạm vi có điện bạn cần nhanh chóng thực hiện các nhiệm vụ theo thứ tự nào sau
1.Báo động – Cắt điện – Dùng các phương tiện dụng cụ hiện có để tiến hành chữa cháy – Điện thoại cho đội PCCC 114.
2.Cắt điện - Điện thoại cho đội PCCC 114 - Báo động - Dùng các phương tiện dụng cụ hiện có để tiến hành chữa cháy.
3.  Cắt điện - Báo động – Dùng các phương tiện dụng cụ hiện có để tiến hành chữa cháy - Điện thoại cho đội PCCC 114


Thứ Bảy, 30 tháng 7, 2016

RESCUE PROCESS

Description: Description: Logo EAM newest
Department
Security
Approved by:
     General Manager
Reference No.:
Section:
Security
Subject:
Rescue progress
First Issued by:
Chief of Security
Date:
2016
Last Revised by:

Date:

Pages:
Attachments:


Quy Trình Cứu Hộ Trên Biển                                               Sea Rescue Process


When observing a life-threating situation at sea, our “sea rescue team” will take immediately action:

-         Inform the Security Manager
-         Have the nurse on standby, if necessary call the ambulance
-         Take the lifesaver

        
Approach the victim carefully and if the person is responsive speak calmly to the person
          Approach the victim carefully and if the person is responsive speak calmly to the person
         Keep a safe distance from the victim, push the ring buoy to the victim, hold on the other end of the rope attached to the buoy, pull back to the shore once the victim has grabbed the buoy. .If the person is not responsive you start immediately the rescue according to the rescue movements. If the person is not responsive you start immediately the rescue according to the rescue movements. Raise the victim in a supine position

Raise the victim in a supine position
Step on the end of the line attached to the ring buoy
Shout to get the victim’s attention. Make eye contact and say that you are going to throw the object now. Tell the victim to grab it. (They might not be able to hear you or respond to you.) When the victim has grasped the object or the line, slowly pull him or her to safety, A ring buoy, life jacket, Throw the floating aid. Toss the float so that it lands within reach of the victim, but do not strike the victim directly. Take the wind and the current of the water into consideration before you throw. Let the victim know that you are about to throw the aid, and that he or she needs to grab the aid.[13]
A good goal is to throw the ring just past the victim, then pull it to him or her with the rope.
If you miss the victim or he or she is unable to grab the aid, pull the line back or try throwing another device.

If repeated attempts are unsuccessful, you may need to try another method or swim to push the device closer to the victim.[14]
 - Once reached the beach:
        Evaluate the person’s situation.
 Depending on the situation of the person
(unconscious, no heart beat etc.), take the first aid measurements properly.  
For safety reason transport the person to the hospital.
Follow up with the hospital about the condition.
     
 -         Try to identify if the person is a guest of the resort.
           If yes, contact the persons traveling with the rescued person, follow   up what the guest might need, sent a fruit basket, if the guest can be released from  the hospital, ensure complimentary transfer   back to the resort.
            If it is not a resort guest, try to find out the identidy, inform police if necessary.

-         At any stage the GM has to be informed / updated.

-         In case of death: The resort has to ensure that it will be handled in a very discrete way and keep the guests / public are kept out of the scene, no information can be disclosed to any one especially not to the press.
-         The GM and PR from Six Senses Home Office will define the necessary steps.


Thứ Ba, 26 tháng 7, 2016

cách dùng văn nói

"When other people saw the child, they thought he was playing. They thought he was acting like he was drowning. Even the two people caring for him thought that. Then we looked at him and thought why is he not moving, he is just floating. It was very frightening.”


Thứ Bảy, 23 tháng 7, 2016

rescue

  1. 10. Reach <ul><li>With a long stick, a scarf, clothes or anything else. Crouch or lie down to avoid being pulled in. </li></ul>
  2. 11. Wade <ul><li>Test the depth with a long stick before wading in and then use the stick to reach out. Hold on to someone else or the bank. </li></ul>http://disaster-risk-management.blogspot.com
  3. 12. Throw <ul><li>A rope is best - you can then pull in the person. Otherwise throw something that will float - a ball, a plastic bottle, a lifebouy...this will keep the person afloat until help comes. </li></ul>
  4. 13. Row <ul><li>Use a boat if there is one nearby and if you can use it safely. Do not try to pull the person on board in case they panic and capsize the boat. </li></ul>http://disaster-risk-management.blogspot.com
  5. 7.  REACH  THROW  ROW  Wade  Go Rescue
  6. 8. Use a throwing assist to rescue someone beyond your reach in a pool or open water. Throw a buoyant object tied to a line to the victim. S/he can grasp the object and be Throw bags
  7. 9. Throw equipment potentially. Any floating object at hand, such as a picnic jug, small cooler, buoyant cushion, kickboard or extra life jacket
  8. 10. 1. Get into a stride position: The leg opposite your throwing arm is forward. This helps to keep your balance when you throw the object. (Cont)
  9. 11. 2. Step on the end of the line attached to the ring buoy/ heaving line/ heaving jug with your forward foot. Avoid stepping on the coiled line with the other foot. (cont)
  10. 12. 3- Shout to get the victim’s attention. Make eye contact and say that you are going to throw the object now. Tell the victim to grab it. (They might not be able to hear you or respond to you.) cont
  11. 13. 4. Bend your knees and throw the object to the victim. Try to throw the object upwind and/or up current, just over (past) the victim's head so that the line drops within reach.
  12. 14. If the victim does not immediately notice and grab the line, move yourself on the deck/ on shore so you can pull the line to get the object under the victim's hand/arm. (cont)
  13. 15.  5. When the victim has grasped the object or the line, slowly pull him or her to safety. Lean away from the water as you pull. (cont)
  14. 16. 6. If the object does not get out as far as the victim, quickly pull the line back in and throw it again. Try to keep the line from tangling, but do not waste time trying to coil it. If using a throw bag, partially fill the bag with some water and throw it again.
  15. 17. Try to keep the line from tangling, but do not waste time trying to coil it. If using a throw bag, partially fill the bag with some water and throw it again.
  16. 18. Don't Go: Don't go into the water unless you are trained the way life guards are trained to rescue injured people. call for help. If you call for Rescue 1122 or 15 stay calm and give your exact location.
  17. 19. Learn first aid: CPR (Cardiopulmonary Resuscitation) for drowning and how to help someone who has been in cold water and may need treatment for hypothermia.
  18. 20.  Go only with assistance and only with trained personnel.  Use flotation aids for the victim like rescue can or rescue tube.  Assisted swimming rescues always with proper PPE.
  19. 21.  Location of Victims In flat water,  location of average patient under average conditions = 1.5x water depth of where he/she went down
  20. 22.  Water is 10 feet deep Patient will be within a circle with a 15 feet radius centered on spot where patient went down. If the surface is under water is flat.  If the surface is not flat then the patient will be 20 to 30 Feet to the slow side
  21. 23.  Location of Victims In moving water, patients will be within 100 to 150 yards downstream  Common locations: Deep holes Eddies downstream of large objects Strainers it is also depend on water speed in the mountain area the patients may go kilometers of downstream
  22. 24. Probing by Bamboo stick If the water is not dirty the rescuer can touch the water and he will see every thing under water easily up to 20 feet under water Through boat and Rescue Rope
  23. 25. Physical Rescue by Rescuer By Rope throw water knots By bamboos stick with hook
  24. 26. Moving Water Most dangerous water rescue Requires proficiency in: Technical rope rescue skills Crossing moving water Defensive swimming Use of throw bags Shore-based and boat-based rescues Ability to package patient in water
  25. 27. Recirculating Currents Develop as water moves over uniform obstructions (rocks, low head dams) “Hydraulic” forms, moves against flow Recirculating water traps people against object
  26. 28.  Strainers Partial obstructions that filter water Downed trees, gratings, mesh Creates unequal force across itself People become pinned water’s force  Strainers Attempt to swim over object Do NOT put feet on bottom
  27. 29.  : Foot/Extremity Pins Walking in moving water over knee depth ALWAYS is hazardous! Foot, leg may become entrapped Person can be knocked below surface by water’s force Extremity held in place by water’s weight, force
  28. 30. Intakes Height is no indication of danger All dams may have recirculating currents Intake grates serve as strainers
  29. 31. Moving Water Self-Rescue Avoid entering water except as last resort! Cover mouth, nose Protect head,  keep face out of water Do NOT attempt to stand up Float on back, feet pointed downstream Steer with feet,
  30. 32.  point head toward near shore at 45 angle Water move slower on inside of bends Look for obstructions Eddies on downside of objects may flow slowly upstream, moving you toward river’s edge
  31. 33. Flat Water
  32. 34.  Factors Affecting Survival Age Position underwater Lung volume PDF use Water temperature Mammalian diving reflex
  33. 35. Factors Affecting Survival PFD Use 89% of all boating fatalities are related to lack of a PFD PFDs should be worn when working in, on, or near water Swimming pools, flash floods can be water hazards even in arid areas!
  34. 36.  Factors Affecting Survival Mammalian Diving Reflex Water <68 ◦F Brady cardia, intense peripheral vasoconstriction Blood, oxygen shunted to core organs, circulated very slowly Hypothermia Slows metabolism Conserves oxygen Only protective if it occurs BEFORE cardiac arrest occurs
  35. 37.  Cold Protective Response YOU’RE NOT DEAD UNTIL YOU’RE WARM AND DEAD!
  36. 38. Rescue vs. Recovery Time submerged Age Physical condition Known/suspected trauma Water temperature Estimated time for rescue/removal
  37. 39. In-Water Patient Immobilization
  38. 40. In-Water Patient Immobilization Assume cervical injuries in drowning victims until prove otherwise
  39. 41. Phase 1: In-Water Splint victim head, neck with arms Roll victim to face- up position Assure open airway Maintain position until cervical collar applied
  40. 42. Phase 2: C-collar Application Primary rescuer maintains airway, SMR Second rescuer sizes, applies collar Second rescuer secures patient’s hand to patient’s waist
  41. 43. Phase 3:  Back boarding Maintain airway and manual SMR Submerge board under patient’s waist Allow board to float up to victim Secure victim with straps
  42. 44.  Phase 4:  Removal Move to extraction point Extricate patient head first Pass from water to rescuers on land Avoid extrication thorough surf Use bystanders who can swim as a breakwater behind patient
  43. 45.  Check the surface of ground in the water  Before inter the water make sure there is no poison insects or snakes in the water  An also check for the sharp edges or bushes under the water.  Before inter the water check your all PFD and PPE equipments .  Don’t allow the non swimmers to go in side water (cont)

WATER RESCUE

A STEP-BY-STEP PROCEDURE FOR SUCCESSFUL RESCUES

Aquatic rescues do not happen the way they are pictured in action movies. In reality, the fearless heroes who throw themselves into water to rescue a victim actually endanger their own life.
Aquatic rescues must always be done according to the Ladder Approach in order to reduce as many risks as possible and to prevent lifeguards from becoming victims. This approach presents, in order of increasing risk, the various alternatives the lifeguard can choose to rescue someone who is drowning. The key is to always choose the rescue technique that involves the lowest level of risk.

THE KEY TO SUCCESS: MINIMIZING RISKS

The first step is to encourage the victim to go to a safe location. If this does not work, try extending or throwing them a buoyant object; if the victim is close enough, a towel might do the trick. If the victim is far from you, throw a flotation device or buoyant aid that is preferably attached to a rope, so you can pull the victim towards you once they have grabbed the object. 
If the victim is too far away from you, you can use a boat to get close enough to throw a buoyant object. If there is no boat, you can swim to the victim to provide them with a buoyant aid.

CONTACT RESCUES

Contact rescues are necessary when the victim is unable to get to a safe location, even with a buoyant object; you therefore must tow them by pulling the other end of the object. This indirect contact gets you nearer to the victim and increases the risks involved. 
As a last resort, swim to the victim and carry them to a safe location. Rescue techniques that require a direct contact with the victim involve a lot more risks, since distressed victims can try to cling onto the lifeguard to get the support they need. Keeping a cool head and staying calm and cautious is your most important asset when rescuing someone.

THE LADDER APPROACH’S EIGHT RUNGS

1- TALK: Without going into the water, encourage the victim to get to safety by swimming towards the side of the pool or the shore. 
2- THROW: Throw a buoyant aid to the victim from the side of the pool or the shore, and calmly talk to them while bringing them back to safety.
3- REACH: From a dry, safe location, extend or throw a rescue object to the victim and pull them to safety. The object may be buoyant or non-buoyant and should be attached to a rope. 
4- WADE: Wade into shallow water and extend a rescue aid to the victim, or enter deep water while holding onto a solid object and throw the rescue aid.
5- ROW: If one is available, use a watercraft and row to the victim until you are close enough to extend a rescue object while staying in the craft.
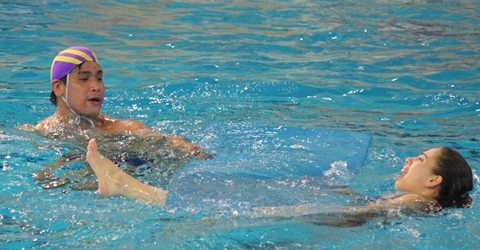
6- SWIM: If there is no watercraft you can use, swim to the victim and provide them with a buoyant aid.  Calmly talk to them while bringing them back to safety without making direct or indirect contact. It is important to push the buoyant aid towards the victim; panic-stricken victims may try to grab onto you, thus endangering you.
7- TOW: If the victim is unable to go to a safe location without additional help, even while hanging onto a buoyant aid, tow them by pulling the other extremity of the object. Make sure you can quickly move away from the victim to ensure your own safety.
8- CARRY: Swim to the victim and carry them to safety. Choose this technique as a last resort, since direct contact rescues are the most dangerous ones for lifeguards.